Embroider a Strawberry Napkins for a Summer Tablescape
A simple linen napkin becomes a summer heirloom with an embroidered strawberry design. This beginner-friendly machine embroidery project is quick to stitch, easy to gift, and makes every table setting feel a little more special.
What You'll Need
- White linen napkins
- Strawberry embroidery design file
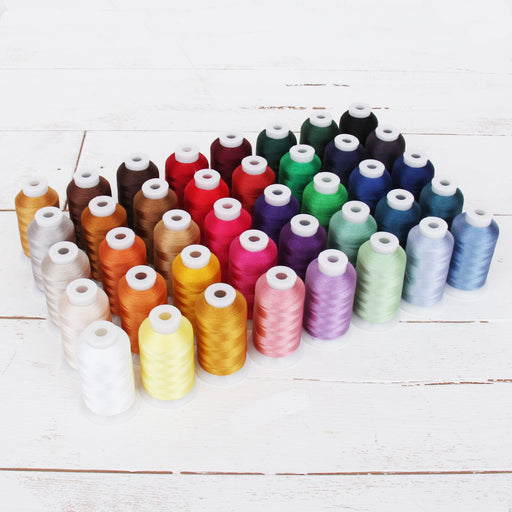
- ThreadArt 1000m polyester embroidery thread — red, green, and pinks
- ThreadArt white bobbin thread
- Tear-away stabilizer (medium weight)
- Embroidery hoop sized for your design (4" x 4" or 5" x 7")
- Small scissors or thread snips

Step 1: Choose Your Design Placement
Decide where the strawberry design will sit on your napkin. A corner placement about 1.5 inches from each hemmed edge is the most classic look for a dinner napkin. For cocktail napkins, a centered design works beautifully. Lightly mark the spot with a water-soluble fabric pen so you have a clear target when hooping.
Step 2: Hoop Your Stabilizer and Napkin
Cut a piece of tear-away stabilizer slightly larger than your hoop. Hoop the stabilizer and napkin aligning your marked placement point with the center of the hoop. Because linen is a woven fabric with some natural texture, the stabilizer will keep it from shifting and help achieve clean, sharp stitch lines.

Step 3: Load Your Thread and Sew a Test Stitch
Thread your machine with the thread colors in your design sequence. Load your white ThreadArt bobbin thread and confirm the tension is balanced. Always sew one test run on a scrap of matching linen with the same stabilizer setup before stitching the actual napkin. Linen can behave differently than cotton, so a quick test protects your finished piece.

Step 4: Stitch the Full Design
Follow the design's color sequence from start to finish. The strawberry design stitches in this order:
- Red fill for the strawberry body
- Pink seed details stitched over the fill
- Green leaf stitches for the leafy vine
- Pink for the flower
Trim jump threads between color changes as you go if your machine does not perform this function. This keeps the napkin tidy, which matters on a table linen that guests will actually handle.
Step 5: Remove the Stabilizer
Once the design is complete, unhoop the napkin carefully. Tear away the stabilizer close to the stitching, using small scissors to trim any stubborn pieces from inside the design. For linen, work gently and tear in short sections rather than pulling in one motion. Any tiny bits of stabilizer left behind will wash out cleanly in the laundry.
Step 6: Press the Finished Napkin
Place the embroidered napkin face-down on a clean pressing cloth or thick towel. Press with a medium-heat iron. Pressing from the back protects the stitching and prevents flattening the texture of the embroidery. The linen will smooth out beautifully and the design will look crisp and polished.

Final Thoughts
These napkins make a sweet handmade gift and are easy to stitch in multiples once your design is dialed in. ThreadArt's wide range of polyester embroidery thread colors makes it simple to match any palette, from soft vintage tones to bright and saturated summer hues.
Materials Needed
-
Original price $0.00 - Original price $0.00Original price $0.00$4.95$4.95 - $4.95Current price $4.95
Strawberries on the Vine Embroidery Design Instant Download - Multiple Sizes - 8 Formats
In stockSingle machine embroidery design set with 3 different sizes. Design sizes are 4, 5 and 4.5 inch and includes 8 popular formats: DST, EXP, HUS, JEF,...
View full detailsOriginal price $0.00 - Original price $0.00Original price $0.00$4.95$4.95 - $4.95Current price $4.95 -
Original price $15.99Original price $15.99 - Original price $15.99Original price $15.99Current price $11.99$11.99 - $11.99Current price $11.99
Premium Cotton Quilting Fabric Sold By The Yard - Vintage Threads Collection - Light Pink Strawberry
In stockHigh quality cotton quilting fabric 44" wide, sold by the yard. Threadart exclusive patterns. Our premium patterned quilting fabric is 100% pure ...
View full detailsOriginal price $15.99Original price $15.99 - Original price $15.99Original price $15.99Current price $11.99$11.99 - $11.99Current price $11.99Save 25% -
Original price $15.99Original price $15.99 - Original price $15.99Original price $15.99Current price $11.87$11.87 - $11.87Current price $11.87
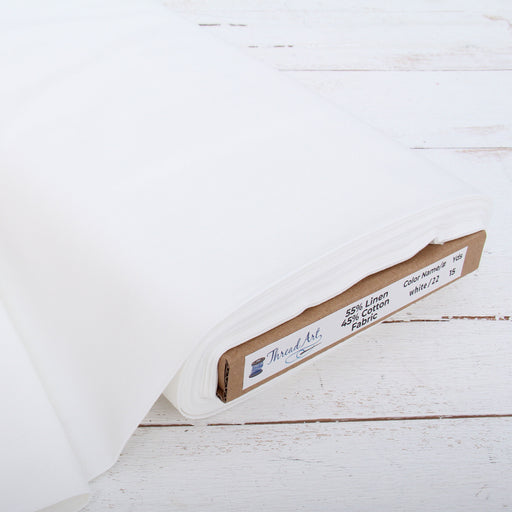
Premium Linen Fabric By The Yard - White 55" Width - Cotton Linen Blend Fabric
In stockBeautiful linen-cotton blend fabric by the yard. This is the perfect fabric for embroidery and cross stitch. A beautiful linen canvas with a rust...
View full detailsOriginal price $15.99Original price $15.99 - Original price $15.99Original price $15.99Current price $11.87$11.87 - $11.87Current price $11.87Save 26% -
Original price $219.60Original price $219.60 - Original price $219.60Original price $219.60Current price $55.43$55.43 - $55.43Current price $55.43
40 Colors Polyester Embroidery Thread Set - 1000M Cones Set A
In stockA set of 40 cones of vibrant polyester machine embroidery thread. 1000 meters (1100 yards) per mini-king cone. This set includes our most popular ...
View full detailsOriginal price $219.60Original price $219.60 - Original price $219.60Original price $219.60Current price $55.43$55.43 - $55.43Current price $55.43Save 75% -
Original price $55.99Original price $55.99 - Original price $55.99Original price $55.99Current price $27.99$27.99 - $27.99Current price $27.99
Regular Tearaway Embroidery Stabilizer - 10 inch 50 yd roll
In stock✅ 10" x 50 yd roll of all purpose medium weight tearaway stabilizer works well with medium to high density and large designs, delicate and stretch...
View full detailsOriginal price $55.99Original price $55.99 - Original price $55.99Original price $55.99Current price $27.99$27.99 - $27.99Current price $27.99Save 50% -
Original price $39.99Original price $39.99 - Original price $39.99Original price $39.99Current price $16.99$16.99 - $16.99Current price $16.99
Regular Tearaway Embroidery Stabilizer - 11x11 100 Precut Sheets
In stock✅ 100, 11" x 11" sheets of all purpose medium weight tearaway stabilizer works well with medium to high density and large designs, delicate and st...
View full detailsOriginal price $39.99Original price $39.99 - Original price $39.99Original price $39.99Current price $16.99$16.99 - $16.99Current price $16.99Save 58%