
Sew a Puffy Fabric Star Ornament
This puffy six-point star is sewn from two layers of cotton, stuffed until each point is plump, and finished with a button at the center. It's an easy beginner sew and a sweet way to use a favorite print. Our free printable template comes in three sizes, so you can make a whole set for the tree.
Skill level: Beginner
Finished size: About 5 1/2, 4 1/2, or 3 1/2 inches across
Time: About 1 hour per ornament
Free template: Download the printable star template (PDF)
What You'll Need
- Two squares of cotton quilting fabric: 7 inches for the large star, 6 inches for the medium, or 5 inches for the small. A small-scale floral like our Sevenberry Peach Ditsy Floral (100% cotton, 44 inches wide) looks lovely on every point.
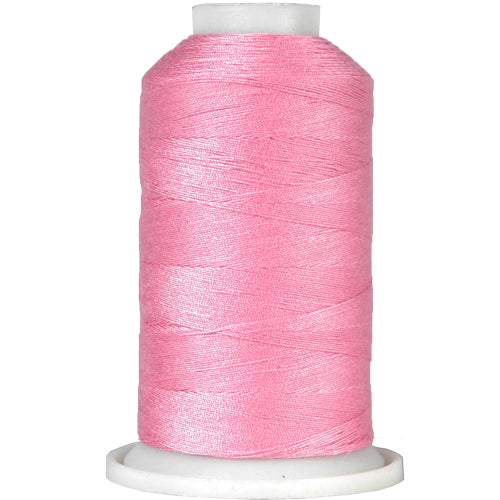
- All-Purpose Polyester Sewing Thread No. 127 in Rose Tint, or a color that blends with your fabric
- About 7 inches of 3/8 inch White Grosgrain Ribbon for the hanging loop
- A small handful of polyester fiberfill stuffing
- One 3/4 inch white button
- Sewing machine
- Long hand sewing needle or doll needle
- Fabric scissors, straight pins, and a few sewing clips
- Chopstick or point turner

Step 1: Print the Template
Download the free template and print the size you want at 100% or Actual Size, not Fit to Page. Measure the 1 inch test square before you cut, so your star comes out true to size.
Each page has two outlines. The solid line is your stitching line, and the dashed line is your cutting line with a 1/4 inch seam allowance. Cut the paper template out along the dashed line.
Step 2: Layer the Fabric and Add the Loop
Place your two fabric squares right sides together with the edges matched. Fold the ribbon in half to make a loop. Slide it between the layers at the spot where the top point of the star will sit, with the loop tucked inside and the cut ends extending just past the edge. Pin the ribbon in place.
Step 3: Pin the Template and Stitch
Lay the paper template on top of the layered fabric, with its top point over the ribbon. Push a pin through the center mark to hold it in place, and add a pin at each of the two dots that mark the opening. Clip around the edges with sewing clips so nothing shifts as you sew.
Set a short stitch length, about 1.5 mm. Starting at one opening pin, stitch right through the paper along the solid line. At every point and inner valley, stop with the needle down, lift the presser foot, and pivot. Stop at the second pin and backstitch at both ends. The short stitches perforate the paper, so it tears away cleanly later.
Tip: Stitch back and forth once over the ribbon ends as you pass the top point. This keeps the hanging loop secure.

Step 4: Tear Away, Trim, and Turn
Gently tear the paper away from the stitching. Tweezers help with small bits caught in the points. Cut the star out about 1/4 inch outside your stitching, then prep the seams so the star turns smoothly:
- Snip straight into each inner valley, stopping just shy of the stitching.
- Trim the fabric off each point, close to the stitching but not through it.
- Turn the star right side out through the opening.
- Push each point out gently with a chopstick or point turner.
Give the star a quick press to smooth the seams before stuffing.
Step 5: Stuff and Close
Work in small tufts of fiberfill, pushing each one all the way into a point before adding the next. Fill all six points firmly, then add a lighter layer through the center. Keeping the middle a little softer lets it dimple nicely in the next step.
When the star feels evenly plump, close the opening with a ladder stitch. It hides inside the seam and is nearly invisible once you're done.
Step 6: Shape the Petals
This is the step that turns a flat star into a puffy one. Thread your long needle with doubled thread and knot the end. Push the needle straight through the center from front to back and back again, two or three times, pulling snug each time. The center pinches in and each point puffs up into its own soft petal.
Tip: For crisper lines between the petals, take a long stitch from the center out to each inner valley and back, pulling gently. Keep your needle threaded for the button.

Step 7: Add the Button and Hang
Sew the button over the center, going through all layers and pulling firmly so it settles into the dimple. Make four or five passes, then knot on the back and bury the thread tail in the stuffing. For a finished look on both sides, add a second small button on the back.
Your star is ready to hang on the tree, tie onto a package, or set on a holiday mantel.

Final Thoughts
Once you've made one, it's hard to stop. Try the same template in our Spring Picnic Gingham Red for a classic farmhouse look, or mix sizes and prints for a coordinated set. A few stars tied with ribbon make a cozy handmade gift.
Materials Needed
-
Original price $15.99Original price $15.99 - Original price $15.99Original price $15.99Current price $11.99$11.99 - $11.99Current price $11.99
Premium Cotton Quilting Fabric Sold By The Yard - Sevenberry Collection - Peach Ditsy Floral
In stockDiscover the beautiful quality of Sevenberry cotton fabric from Japan. This premium quilting fabric is 44 inches wide, sold by the yard, and made f...
View full detailsOriginal price $15.99Original price $15.99 - Original price $15.99Original price $15.99Current price $11.99$11.99 - $11.99Current price $11.99Save 25% -
Original price $15.99Original price $15.99 - Original price $15.99Original price $15.99Current price $11.99$11.99 - $11.99Current price $11.99
Premium Cotton Quilting Fabric Sold By The Yard - Spring Picnic Collection - Gingham Red
In stockHigh quality cotton quilting fabric 44" wide, sold by the yard. Our premium patterned quilting fabric is 100% pure cotton in a soft pliable 145g/...
View full detailsOriginal price $15.99Original price $15.99 - Original price $15.99Original price $15.99Current price $11.99$11.99 - $11.99Current price $11.99Save 25% -
Original price $2.99Original price $2.99 - Original price $2.99Original price $2.99Current price $1.99$1.99 - $1.99Current price $1.99
Sewing Thread No. 127- 600m - Rose Tint - All-Purpose Polyester
In stockDiscover the Perfect Sewing Thread! Our All-Purpose Polyester Sewing Thread offers the ultimate versatility, whether you're sewing apparel, craftin...
View full detailsOriginal price $2.99Original price $2.99 - Original price $2.99Original price $2.99Current price $1.99$1.99 - $1.99Current price $1.99Save 33% -
Original price $2.49Original price $2.49 - Original price $2.49Original price $2.49Current price $1.99$1.99 - $1.99Current price $1.99
Grosgrain Ribbon 3/8" - 10 Yards - White
In stockOur solid grosgrain ribbon has a fine ribbed texture that's sturdy and holds its shape, so bows stay crisp and trims lie flat. At 3/8" wide, it's a...
View full detailsOriginal price $2.49Original price $2.49 - Original price $2.49Original price $2.49Current price $1.99$1.99 - $1.99Current price $1.99Save 20%